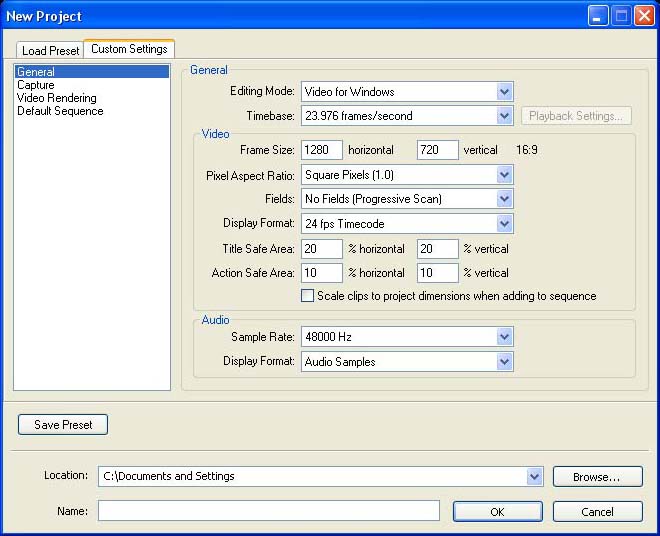
Step 3: Editing You are now ready to start editing by using the File->Import selection
to bring the MXF or Raylight AVI files into Premiere. Shown below
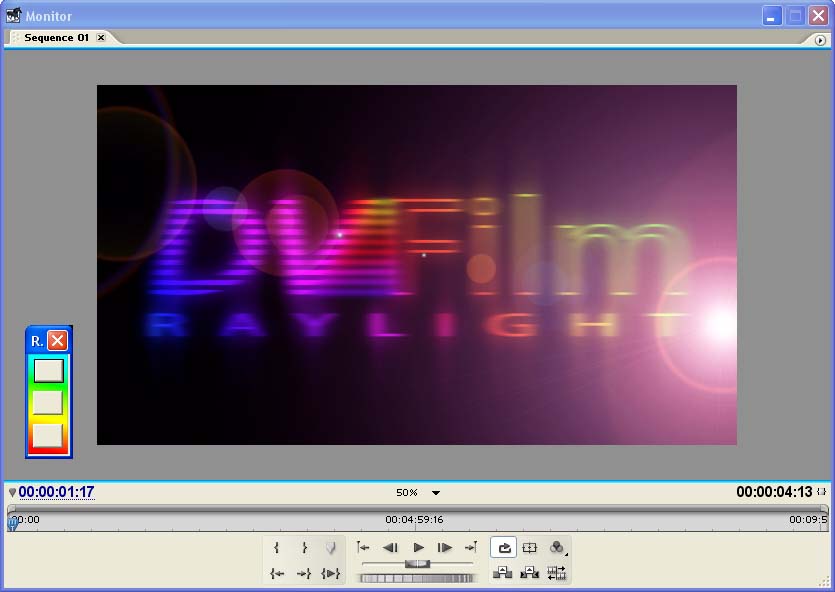
is the Premiere Monitor during playback:
|
|
|
|
|
|
|
|
|
|
|
|
 |
|
|
|
|
Remember to use the Raylight Control Panel described in Part 1
of this tutorial to set the quality level during playback (see
above screen shot of the Premier Monitor with Raylight Control).
If the playback is not smooth, reduce the quality level to Yellow
or Red. If you need higher resolution, increase the quality level
to Yellow or Blue. Note: for MXF files, Red works the same as
Yellow. The frame size of the Premiere Monitor should be set to
50% or less for smooth playback, as shown above. You may also
need to select Draft Mode for smooth playback. (Technical Detail: If you are playing back from the timeline and
there is a mix of high- and low-resolution frames, it's because
Premiere is playing back from its internal memory. Sometimes its
necessary to save your project and restart Premiere to force it
to use all high-resolution frames after changing from Raylight
Red to Raylight Yellow or Blue.) |
|
Step 4: Export the Movie
Remember to select Raylight Blue before rendering your movie for presentation!! If you did the
previews in Raylight Red or Yellow, you can redo the previews
by changing to Raylight Blue, then in Premiere select Sequence->Delete
Previews. The previews will go red and then you can hit Enter
to remake them.
Playback on the HVX: see Part 6, P2 Authoring.
or a DVD Movie Export a finished movie to widescreen DVD format. Click on File->Export
and select MPEG-2 file 23.976 fps with 3:2 pulldown, widescreen, if you shot and edited at 24P. The audio should
be exported to the Dolby Digital AC-3 format. For more information
refer to the Adobe Premiere help facility.
or HD-WM9 Export a Windows Media 9 HD movie file at 1280 x 720 or 1920
x 1080. Use 23.976 frames/sec if you shot and edited at 24P. We
recommend constant bit rate (CBR) at about 6Mbits/sec for starters,
but you can experiment with VBR (variable bit rate) or other CBR's.
This format can be burned to a DVD data disk and some DVD players
can play it back on either an HD-capable computer system or HD-capable
television. For more information refer to the Adobe Premiere help
facility or Microsoft's HD-WM9 website, see here and here.
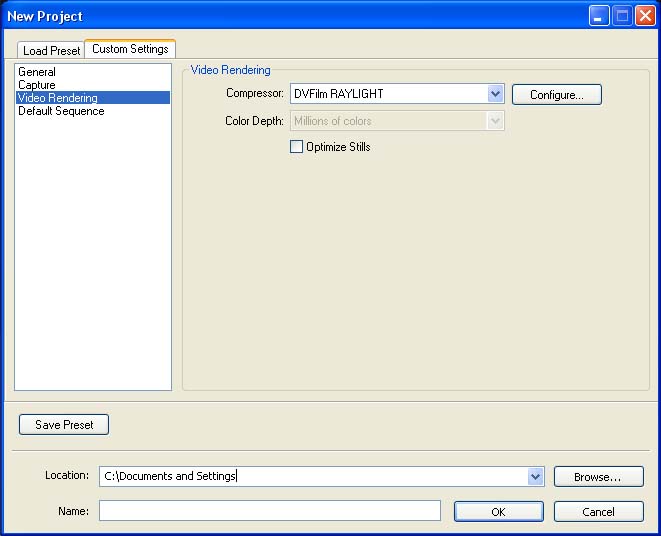
or Uncompressed AVI for archive or transfer to film or HDCAM-24P. Click on File->Export
and select the Video for Windows file format. Then click on Custom Settings and select the options
shown below: |